I use Obsidian daily as a journal system, a knowledge base, and writing tool. But also as a record of what AI coding agents are doing. I don’t always offload work to AI, but when I do, I prefer accountability. So here’s my setup:
Keep a reliable folder hierarchy in Obsidian for projects. I have /Project Notes/<ProjectName> as my scheme.
Within it, have an AI Notes folder.
Add the following to AGENTS.md or CLAUDE.md:
* Keep a record of any approved plans in the form of ``YYYYMMDD-HHMM - Summary.md`` under an `AI Plans` directory under the relevant project directory in`/Users/chipx86/Documents/Obsidian/Main/Project Notes`. Search for the project name under here (it may be nested) and, if not found, suggest a name relative to this and let me correct you if needed. You may create directories within here.* If there's any particularly interesting tips or concepts that are discovered during development, record them. If this is specific to a project, file it in a`Project Tips` directory under the corresponding `Project Notes` directory. If instead it's more general to programming (not-project-specific), write them to`/Users/chipx86/Documents/Obsidian/Main/Today I Learned/AI Drafts` (named in`YYYYMMDD - Summary.md` format). Not every change warrants this, only if it's noteworthy. You may ask me if there's any doubt.* For any records living in Obsidian, use Obsidian Frontmatter to specify the date and tags at the top of the file:```markdown---date: YYYY-MM-DDtags: - "..." - "..."---``` Fill out as appropriate. For plans, use the `AIPlan` tag. For interesting notes, use the `til` tag.
(Claude Code usually respects this. Though sometimes I do have to give it a nudge. Always check!)
Keep in mind, coding agents do their job and then forget. And we can easily forget along with them. They don’t think about their work after the fact and they don’t take showers. So keeping records and receipts of their work can be incredibly helpful when going back to a change and wondering, “what the hell was it thinking?”
Code review is important, maybe more important than ever, but inherently focuses on the end result. We’ve long done Image Review and Document Review, which is also not Code Review. And now that development is changing, as AI takes on more of the process, review needs to involve the work items AI will pick up, any planning or assets that precede the change, and any weigh-in from other people or agents involved in the project.
So we’re rethinking Review Board’s role as more an end-to-end Review-Driven Development tool.
Not just code review, but the review of the high level and the nitty-gritty. The staging of the work and the end result. The things that keep teams able to collaborate and build a product without it going off the rails in siloed one-off Claude or Codex sessions.
This is the Mission Control feature we’re building right now for Review Board 10.
And like everything we do, this will focus on on-prem, privacy, security, and work with existing tooling (rather than yet another walled garden dev ecosystem).
Planning to talk more about this as we get closer to having something to show.
I feel like the world of code review has somewhat stagnated. Most people use a variation on GitHub Pull Requests, which slowly began to catch up to the kinds of features we have in Review Board, but never quite got there. Good enough for many, but could be better for most.
In a similar vein, the world of code review has stagnated in what and where people can review. You pretty much have to be on a bespoke Git-based service, which leaves out companies with decades of history backed on Subversion, Perforce, and others. And you’re limited to just reviewing source code, when there’s so much more that goes into a product.
We built Review Board at a time before pull requests and the prevalence of Git, a time when code review was barely a thought in the minds of most software developers. As the concepts we worked to pioneer began to take hold, and more solutions entered the market, we watched them begin to coalesce around an overly-simple model that left little room for the non-code assets that comprise so many projects. We watched as cloud-based solutions began to dominate and on-prem got left behind along with all those legacy customers.
And now we’re watching the older waves of on-prem solutions begin to disappear, leaving customers stuck. Watching the rise of AI-focused and AI-only solutions threaten further slop in projects, with minimal human oversight.
And with all this, whole industries of creators are still being passed over.
We’re building better solutions
We have a few major things in the works for Review Board I’m so happy to begin talking about:
AI functionality is coming, and we’re building it with humans in mind. We believe in building stronger engineering teams instead of replacing them with AI. I’ll be talking about what’s coming as we get closer to launch, but this isn’t just another “throw code at the AI and hope its feedback is worth it.”
EDA Design is a major new feature we’ve got in the prototype phase. It allows designs for schematics and PCBs to be viewed, analyzed, and diffed across revisions. We announced that today for anyone interesting in signing up for a beta.
Crucible Import is also in progress. For decades, many industries depended on Crucible for their development, but in 2028 Crucible will be dead. Review Board is a good, modern fit for Crucible users, and we’re making it easy to import your history and pick up where you left off. There’s no need to move away from Perforce, Subversion, or whatever else you’ve got, but at the same time you can begin to review code hosted on GitHub, GitLab, Jujutsu, or others. Crucible users can sign up for a beta.
And we’re staying on-prem. Others want to bring you into their fold so they can own your whole environment. We believe in the portability and choice of tools, on-prem or in the cloud, and are holding firm on that.
I’ve written a lot of code over the past 35 years.
In my earlier years (starting at age 7), everything was an experiment, with nothing slated for production (thank god). I didn’t know the limits, I didn’t know design, and I didn’t know what I didn’t know. It was chaotic and glorious.
In my teens, responsibility began to kick in. I found myself in the world of Linux development, working on GNOME and Gaim/Pidgin, and later creating libnotify/notification-daemon, Galago, and others. So much of what I built was suddenly used by people and companies around the world. If I had an idea — a new function, a new feature — and saw it through, it’d be on people’s systems, part of people’s toolkits, part of my maintenance burden.
Early in my professional career, a friend and co-worker gave me piece of advice that stuck with me:
Don’t build what you don’t know you need.
If you only think you or your users will need that function or that interface someday, but there’s no evidence of it yet, maybe leave it out.
I grappled with this for a while, and initially pushed back against the idea (“BUT WHAT IF IT’S USEFUL!”, I’d think), but… he was right. And it ultimately shaped how I developed software, though with one tweak:
Don’t ship what you don’t know you need.
There’s value in the building, but that doesn’t mean everything you build must make it into the codebase.
I let this guide me when working on Review Board and other projects. It’s easy to go down a rabbit hole and want to fully flesh out some piece of architecture to its extremes or build some cool what-if feature, because it’s fun to write code! But more and more, I instead find myself choosing to leave that code behind and out of my final commit or review request.
It’s good to build, though. Exploring a concept, finding the extents of it, really understanding the problem space. But, if you trim it down to its best parts, you’ll often end up with something far more maintainable, more reviewable, more ready to build upon in the future.
Think about photography (do you dabble? I do). You might take a hundred pictures of a sunset and show just one or two. The stars of your work, the best of the best. All those pictures contributed to finding the ones you most want the world to see, but once you’ve done that, you can shelve those photos or toss them out.
Those pictures — and that code — may still be worth looking at in the future, worth revisiting. But it doesn’t need to be part of what you present, right now.
To put it simply, aim for quality over quantity, and know what to leave on the cutting room floor.
Let’s go over a neat thing I learned about this week.
We all know binary counting. It’s natural, we’re introduced to it around age 1 or 2, it’s delicious, and… no wait, I’m thinking about ice cream.
Focus, Christian.
Okay, so binary counting looks like this:
0 = 0001 = 0012 = 0103 = 0114 = 1005 = 101
Something you might notice is that often times you end up flipping multiple bits at once. Let’s look at the numbers 3 and 4:
3 = 0114 = 100
We flip all 3 bits when incrementing between 3 and 4.
That’s usually not an issue, but if they can’t all be flipped at exactly the same time (say, some mechanical operation is involved and there’s the slightest of delays between each flip), you could end up with these in-between numbers that aren’t what you’d expect.
Say the bits get flipped one-by-one, left to right:
3 = 011 111 // 7! 110 // 6!4 = 100
We got the garbage numbers 7 and 6 while trying to go from 3 to 4. That’s probably not great.
A solution to this is to flip only one bit when going between two numbers. And an approach to this is Gray code or “reflected binary code”. This is an alternative binary system where each number only differs by a single bit, making the above situation impossible:
Since there’s only ever one bit change at a time, you never risk getting a garbage value while flipping bits. Bit changes don’t have to be atomic.
There’s a few places where you may find Gray Code encodings:
Rotary encoders
Analog-to-Digital signal conversion
Position sensors
Error correction during communication
Some genetic algorithms
I just got those from the Gray code Wikipedia page. This has tons of examples and variations and so many diagrams and animations. You can tell that the editors were really interested in this subject.
It’s pretty easy to go between decimal numbers and Gray code. Just a bit of math:
I enjoy my morning routine. Get up, wake to the world through the phone, nibble on some breakfast, and sit down at the computer. I like to remind my sleepy brain what I was working on the night before, skim through my notes, get all that mental context ready for the day.
Then I take a shower and let the stream of water ease my mind into a calm, zen-like state, free to let the thinkless thoughts flow.
That’s usually when a brilliant idea will pop into my head. Or when I realize what I did wrong last night. Or when I come up with a better way forward.
If not in the shower, maybe it happens in my late-night slumber, solutions through a mess of vivid dreams. But whether dreamland or my morning shower, this is when important insights usually come to me.
Insights that depend on the depth of my work, the mental context I’ve developed working through the nuances. Insights that come from letting my brain sit with the problem, exploring it while I’m off doing other things. Insights that come to me in the shower.
Now, AIs are a powerful tool. They can achieve wonders. They can write code faster than I can. They can explore concepts in a fraction of the time and teach them to me. They can catch what I might miss. They can even rewrite my codebase from Python to Go and back.
But AIs don’t take showers.
They don’t sit and think about the problem after the code has been written. They don’t wake up at 3AM with a sudden realization. They don’t debate with themselves over the what-ifs and maybe-if-I’s. They don’t have a conversation over coffee or a read through a thread that sparks a sudden “ohhhh!” moment.
Their human could do all that. But their human hasn’t spent time with the code the way the AI did, didn’t internalize the decisions, weigh the trade-offs. Their human won’t know the code as well as the AI did in the moments it was writing it, just hours ago.
The code the AI has since forgotten.
That code now simply exists, a relic of a process, waiting to be learned all over again by people who didn’t write it. There’s nobody left who remembers the hundreds of tiny decisions that led to the way it is now. Nobody who struggled and theorized and debated their way to something finally ready for review. Nobody to call up and ask why it was done this way and not that way.
The great cognitive debt fallout felt from every layoff, now applied to every code change in the product.
There’s a lot about Faxanadu that’s been kept secret since the game was originally developed in the 80s. Secrets I’ve been discovering in my Faxanadu disassembly work.
One of the most surprising to me was hidden code for a World Warp, letting you jump to any of the 6 regions of the game: Eolis, Trunk, Mist, Branch, Dartmoor, or the Evil Fortress.
All with a single button press. (And a couple of Game Genie codes.)
During development of Faxanadu, code was put in the game to make it easy to jump to other areas within the game for testing. This isn’t an uncommon thing for game developers to do. You don’t want to have to play through half the game every time you want to re-test the fog animation in the world of Mist.
This code was wired off from the rest of the game, existing only as a sequence of 44 bytes.
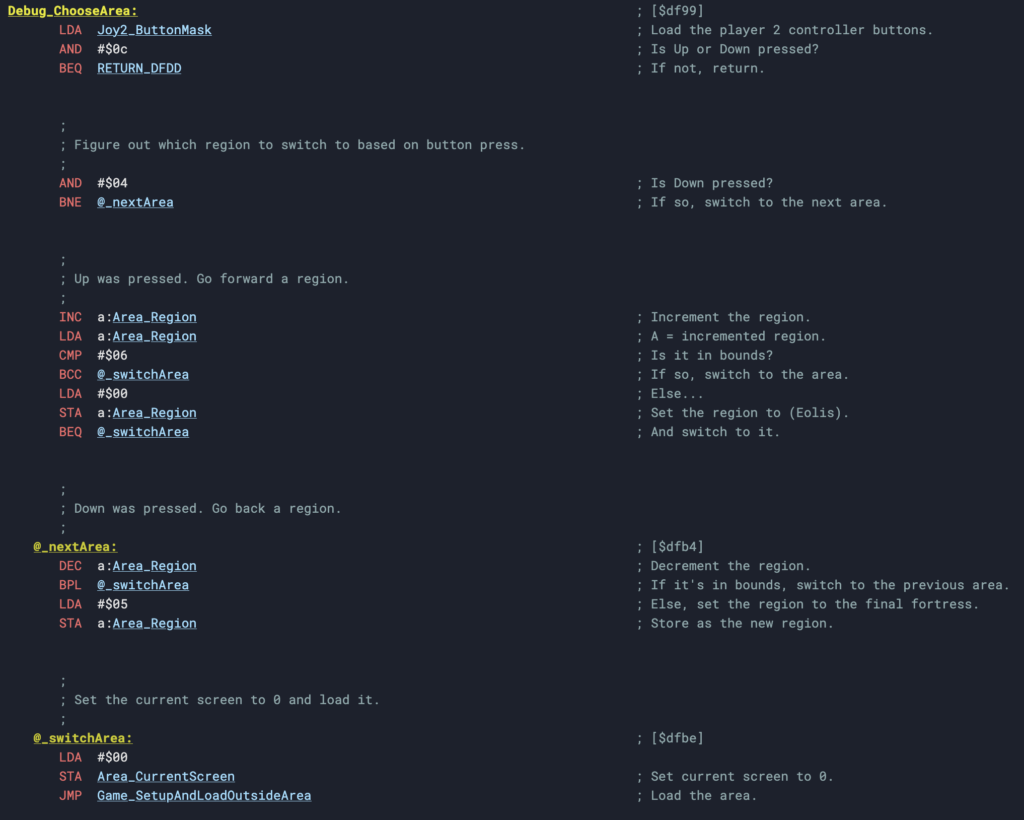
This small sequence of code looks at the controller 2 button mask (the only place in the game that cares about this controller) and checks if Up or Down is pressed.
If Up is pressed: Go forward a world.
If Down is pressed: Go back a world.
That wraps around, so if on Eolis, Down takes you to the Evil Fortress. Up takes you back to Eolis.
This is, by the way, a quick way of getting to the final boss of the game (spoilers!):
Not that it’ll do you much good.
Activating the World Warp
Since this 44 byte packet of debug code is wired off from the game, we have to patch it back in.
We can do this with two Game Genie codes:
OPYISU
NIYIVU
This will turn off your ability to Pause, but turn on the World Warp.
Game Genie codes are just a magic way of saying “At this address in memory, replace the value with a new value.” So let’s start by seeing what those codes translate into:
DB75:99 — Set the value 99 at address 0xDB75 in memory
DB76:DF — Set the value DF at address 0xDB76 in memory
Why those values? Those addresses?
Well, 0xDB75 and 0xDB76 are operands to a JSR instruction (Jump to Subroutine) that specifies an address to call every tick of the game loop. This function is GameLoop_CheckPauseGame at 0xE02B. This is the least-invasive function to replace. We can live without pausing.
We’re swapping that out with our new address: 0xDF99. This is the address where the world warp code lives.
Go ahead, put those Game Genie codes in your NES Game Genie (or your emulator), and press Up or Down on Controller 2. Play around with jumping from different screens, and from inside buildings! You may just glitch into a garbage world for a bit where the screens no longer match up. It’s fun!
The Code behind the World Warp
This code lives in Bank 15 at 0xDF99 in memory. Bank 15 is always in memory, by the way, and contains most of the main game loop, PPU, screen transition, and player state code, amongst others.
Now you may not be intimately familiar with 6502 assembly, which is kind of weird but I’ll allow it. So let’s look at this in C form (a language everyone feels comfortable with!):
I’m using the names I have in my disassembly. These may change over time. The “Region” is the “World” we’re switching between. (They’re not really independent worlds in the game, just regions of the World Tree.)
Pretty simple. Press Up, increase the region/world, and handle wrapping. Do the opposite for Down. Then, set the screen we’re going into and load the area.
Now, although it’s setting the screen number, there’s a lot more to setting the target screen than that, particularly when you’re inside a building. So depending on where you are when you warp, you’ll end up either in some predictable useful locations, or in Garbage Land. Both are fun to play with.
Wait, wasn’t Part 2 about Behavior Scripts?
In my first post in the series, I said I’d be going into Behavior Scripts next. That was a big fat lie. I will be, but today I thought it’d be fun to show off this piece of code that’s been hidden for 2030 (oh my god) 40 years.
We’ll get to Behavior Scripts soon.
If you’d like to follow my Faxanadu work, you can check out the following:
Faxanadu for NES has always been one of my absolute favorite games of the NES library. This adventure starts off in the town of Eolis at the base of the giant World Tree, home to the Elves and Dwarfs. A world corrupted by a poison, transforming the Dwarfs into horrific monsters.
This game’s visuals and musical score always made it a stand-out game for me, and though it didn’t receive the notoriety of Castlevania, Zelda, Kid Kool, or other top-tier action adventure games at the time, it’s increasingly become a favorite to those discovering or rediscovering retro games. Better late than never.
It’s also technically very interesting.
In 2025, I began performing a disassembly of the Faxanadu ROM, using Ghidra and my own crafted Retro-Tinkertoys. The goal was to learn how this game worked, inside and out, and to document it with the hope that it would lead to mods for new games set in this world. And it did.
At this point, all the important parts of the game are either documented or now well-understood. New discoveries, such as hidden code for level switch, remnants of older game designs, unused code, and some interesting bugs have been discovered.
Plus, three built-in binary scripting languages. One for the advanced music engine (MScripts), one for enemy or NPC behavior (BScripts), and one for NPC and item interaction (IScripts).
I’m going to start our deep dive into Faxanadu today by talking about the Interaction Scripts, which I’ll be referring to as IScripts going forward.
What is an IScript?
IScripts define what happens when the player interacts with an entity. That may be an item or an NPC, such as a shopkeeper or villager.
They look like this:
80 # King interaction0D # If Player Has Gold:5A A3 # Then jump to _HAS_GOLD ($A35A).01 # Show Unskippable Message:35 # Message 53 (Exposition).09 # Add Gold to Player:DC 05 # 1500G.00 # End Script._HAS_GOLD:03 # Show Message:36 # Message 54 ("Nothing more I can do to help").00 # End Script.
This particular script is the King, one of the first NPCs you meet in the game. He sends the hero on his quest with enough money to buy a sandwich, bag of chips, and a butter knife. He’s also big into exposition, putting in just enough effort to stand up for a minute to send you off to solve his problems. Royalty.
Any time you talk to the King, that script runs. And knowing how that script runs, we can see that if you spend all your money, he’ll just give you more. Not a new discovery, but this clearly shows how it works. If the player has no gold, give the player gold. The end.
The script is small and simple, but they can do a lot. This is an NES game where bytes and speed matter, so rather than a complex text-based scripting language like you’d find today, this is a compact binary-based scripting language. Every byte is either an instruction or an argument to an instruction. In these scripts, I’ll show the bytes and add comments describing what they do, so you can follow along. Values in the comments are in decimal, and all bytes are in hex.
Structure of a IScript
The entity, aka “Who are we talking to?”
The very first byte of a script states the entity the player is interacting with. If this is anything but 00 (a generic interaction), this will show that entity’s portrait when the script starts. The portrait is animated, and they all blink a lot. It can be unnerving.
Entity IDs can be any of the following:
0x00: Generic interaction
0x80: King
0x81: Guru
0x82: Martial Artist
0x83: Magician
0x84: Doctor
0x85: Nurse
0x86: Pink Shirt Guy
0x87: Smoking Guy
0x88: Meat Salesman
0x89: Tools Salesman
0x8A: Key Salesman
You’ll notice that each entity starts at 0x80. There’s a reason for this. 0x80 is 10000000 in binary. So the entities are all identified as numbers 0 through 10, with the most-significant bit set. The game checks if that bit is set (entity_id & 0x80) in order to determine if it should show a portrait. Then it masks out that bit and uses the number as the index into a portraits table. Neat!
Instructions
After this are instructions. These are actions that can be performed in a script. The game will play through the script’s actions until the script ends (which is an explicit action that all branches need to call!).
There are a lot of instructions. These include instructions that show messages, take or give gold/items/HP/MP, check for inventory items, check for or update the player’s experience title, open shops, check certain objectives or mark them complete, set a spawn point, show a password for the player’s state, goto a script address, or finish the game (the very last instruction ever run).
Each item is 3 bytes: The item ID (1 byte) and the cost in gold (2 bytes).
It’s pretty compact. 5 items would only take 15 bytes.
In Faxanadu, every shop you interact with in the game uses its own shop items table with its own full list of items and their own prices. There’s no start to a shop, technically, so a mod could do something a bit more interesting, though. They could reuse shop data, making one shop a subset of another, by just pointing to an address within another shop.
Let’s go back to IScripts, and check out a few examples within Faxanadu.
Interacting with a shop.
We just looked at a shop, so let’s see how they tie into IScripts. Follow along with me!
89 # Tools Salesman interaction03 # Show Message:0F # Message 3 ("I sell tools, what would you like?")0F # Show Buy or Sell Menu:E0 A3 # If "Buy", jump to _SHOW_BUY ($A3E0).11 # Show Sell Menu:6C A4 # Shop address $A46C,# Then continue after closed.03 # Show Message:02 # Message 2 ("Thank you for shopping.")00 # End Script._SHOW_BUY:08 # Open Shop:6C A4 # Shop address $A46C,# Then continue after closed.03 # Show Message:02 # Message 2 ("Thank you for shopping.")00 # End Script.
This is a common pattern for shops. First, a “Buy or Sell” menu is shown. If the player chooses “Buy”, it’ll jump to one address to open a shop in “Buy” mode. If they choose “Sell”, it’ll continue to the next instruction, and then open a shop in “Sell” mode.
Scripts can give these choices, or only offer a “Buy” or a “Sell”.
Working with the player’s inventory
Shops aren’t the only way to get items into or out of a player’s inventory. There are actions for that. Let’s take a look at this drunk guy in the town of Victim.
00 # Generic interaction0C # If Player Has Title:0A # "Soldier"5A A2 # Then jump to _HAS_RANK ($A25A).03 # Show Message:74 # Message 116 ("Go to the capital...")00 # End Script._HAS_RANK:12 # If Player Has Item:22 # "Armor: Full Plate"63 A2 # Then jump to _HAS_ARMOR ($A263).01 # Show Unskippable Message:75 # Message 117 ("I've got this armor...").07 # Give Item To Player:22 # "Armor: Full Plate".00 # End Script._HAS_ARMOR:03 # Show Message:76 # Message 118 ("I'll have a drink...")00 # End Script.
Here, we have some more branching going on, some player title and item interaction. (Player titles, by the way, are based on your experience, and afford you more gold when you start your game next, more acceleration when walking/running, and maybe surprisingly, a shorter duration for the Wing Boots).
This script checks if the player reached the rank of “Soldier” or higher, they’ll be given the Full Plate armor, if they don’t already have it. If they haven’t advanced that far yet, they’ll be given instructions on where to go next. Dialogue changes based on these conditions.
Working with quests/objectives
Faxanadu tracks what we call “Quests,” which are special objectives the game tracks and includes as part of your password (something we’ll visit in the future).
Quests are represented internally as a few bits in a bitmask. When certain things happen, a particular bit is set. Some IScripts check bits to see how far the user has gotten and what needs to be done next.
When you interact with the man protecting the Spring of Trunk, the man’s IScript does a lot:
It checks if you’ve completed the Spring of Trunk quest, in which case it’s done.
Otherwise, it asks you if you have an elixir you can part with. If not dismissed, it checks for an Elixir in the player’s inventory.
If an Elixir is present, it’ll take it, set the quest as complete, and tell you what to do next.
If an Elixir is not present, you die. *Checks notes*. Sorry, you’re told to come back with an Elixir to awaken the spring.
Here’s how that script looks:
00 # Generic interaction0B # Check If Quest Complete:01 # Quest 1 (Spring of Trunk),C0 A1 # Then jump to _IS_COMPLETE ($A1C0).02 # Show Question Message:59 # Message 89 ("This is the Spring of Trunk. Gimme an Elixir!").12 # If Player Has Item:92 # "Item: Elixir",B9 A1 # Then jump to _HAS_ELIXIR ($A1B9).03 # Show Message:5B # Message 91 ("Come back with an Elixir").00 # End Script._HAS_ELIXIR:01 # Show Unskippable Message:5A # Message 90 ("2 more springs to go!").10 # Remove Item from Player:92 # "Item: Elixir".0E # Set Quest Complete:01 # Quest 1 (Spring of Trunk).00 # End Script._IS_COMPLETE:03 # Show Message:5C # Message 92 ("Find the poison in Mascon").00 # End Script.
You can get a sense as to how complex these can be.
How do you do, Guru?
We’ll end on two more related scripts.
In Faxanadu, you’ll visit Gurus to seek guidance, check your stock portfolio, get a title upgrade (if eligible), and see your new password for your next gaming session. Most Gurus are scripted the same way, with an initial block that’s location-specific and a jump to common Guru scripts (one for new title, one for showing a password):
81 # Guru interaction06 # Set Spawn Point:03 # Temple 3 (Mascon).04 # Check to Update Player Title:00 A6 # If updated, jump to COMMON_GURU_NEW_TITLE ($A600).17 # Jump to:FC A5 # COMMON_GURU_SHOW_PASSWORD ($A5FC).COMMON_GURU_NEW_TITLE:01 # Show Unskippable Message:23 # Message 35 ("I shall give you a title of...").00 # End Script.COMMON_GURU_SHOW_PASSWORD:03 # Show Message:22 # Message 34 ("I shall meditate with you").14 # Show Password.00 # End Script.
But in the town of Conflate, there’s a Guru that goes above and beyond by giving you the very important Ring of Dworf (you need this to unlock a certain door — yes, that’s the spelling, it’s not my fault) if you’ve met the criteria (you need the Battle Suit).
81 # Guru interaction12 # If Player Has Item:23 # "Armor: Battle Suit",34 A6 # Then jump to _HAS_BATTLE_SUIT ($A634).# This is the same logic normally seen in other Guru scripts._STANDARD_GURU_LOGIC:06 # Set Spawn Point:05 # Temple 5 (Conflate).04 # Check to Update Player Title:00 A6 # If updated, jump to COMMON_GURU_NEW_TITLE ($A600).17 # Jump to:FC A5 # COMMON_GURU_SHOW_PASSWORD ($A5FC).# And this is the new "Got a Battle Suit? Here's a ring to go with it!" logic._HAS_BATTLE_SUIT:12 # If Player Has Item:82 # "Special Item: Ring of Dworf",2C A6 # Then jump to _STANDARD_GURU_LOGIC.01 # Show Unskippable Message:8C # Message 140 ("Here's how you get to Dartmore...").07 # Add Item to Player:82 # "Special Item: Ring of Dworf".00 # End Script.
You can see not only how they can make different versions of the same type of NPC more complex, but how scripts can jump to other scripts, reusing building blocks built elsewhere. While Faxanadu doesn’t have a ton of shared scripts, modders can do a lot with this to optimize their code.
IScripts: They’re super versatile!
Someone modding the game could do a lot to build upon this. For example:
Have the right combination of items fetched throughout the game, and you’ll be given an end-game item.
Shop prices change based on player title (using different shop addresses).
Available items in a shop grow or shink as you progress in the game.
Dismiss an NPC’s story too many times, and the NPC takes all your money.
And since IScripts also apply to item interactions:
Lose money when picking up an item.
Exchange one item for another.
Health-replenishing items.
This can all be built just using the IScript instructions. More advanced games can do even more by rewriting some of the assembly code backing these commands. But that’s a topic to cover later.
But how does it do all this?
Obviously these batches of bytes don’t do the work themselves. This isn’t assembly code, it’s just data.
Behind the scenes is a small scripting runtime, consisting of a few parts:
A script runner function that can be called when the player collides with an item or interacts with an NPC.
A table of IScript entrypoints (generally one slot per script, keyed off by an ID assigned to an item, NPC, or event, and also split into lower/upper bytes tables).
Starting a script
We start our journey at IScripts_Begin. This is our script runner. It takes the index into the IScript entrypoint table and does the following:
Loads the address of the IScript, given the entrypoint in the table.
Reads the first byte as the interaction entity ID, storing that so any portrait display can pull up the right images.
Prepares for any text or shop display (IScripts almost always show a textbox or shop, so it gets this ready).
It’s a simple loop. It does exactly what it needs to do. It’s fast and efficient and powers almost everything you interact with in the game.
Mods could extend the handlers table and build all-new action handlers for their game. It’d require moving some things around, but it would be entirely doable.
Time for a demo
Actually, I’ll give you two of my very own.
Demo 1: The ultimate Faxanadu speedrun
The first is the fastest speed run of Faxanadu, where our hero learns that there’s more to life than deserted towns and monsters hanging out in overgrown trees.
This uses a custom message along with the “Finish Game” instruction, which, well, ends the game. It looks like this:
00 # Generic entity01 # Show Unskippable Message:01 # Message 01 ("... On second thought...").15 # Finish Game.
Demo 2: Beer Run!
I like this one. It’s the very first mod built with IScripts. I built it it to test what I was disassembling and documenting.
Our hero comes home to find the local economy in ruins. Upon entering the town, a bum asks him to buy him a beer. This little fetch quest has a nice reward at the end.
It involves a number of new scripts (none of which I have anymore, oops — early testing). One NPC has been given shop capabilities, and another has a few items to hand out.
Next Up: Behavior Scripts
So that’s how Faxanadu handles interactions behind the scenes. Not a bunch of assembly logic (well, not just…), but rather simple-yet-powerful space-efficient scripts and a little scripting engine.
I mentioned before that this is just one of three scripting engines built into the game. Next time, we’ll dig into how enemies, bosses, and NPCs behave, using Behavior Scripts.
If you’d like to follow my Faxanadu work, you can check out the following:
Python offers a handy module called pprint, which has helpers for formatting and printing data in a nicely-formatted way. If you haven’t used this, you should definitely explore it!
Most people will reach for this module when using pprint.pprint() (aka pprint.pp()) or pprint.pformat(), but one under-appreciated method is pprint.saferepr(), which advertises itself as returning a string representation of an object that is safe from some recursion issues. They demonstrate this as:
>>>import pprint>>> stuff =['spam','eggs','lumberjack','knights','ni']>>> stuff.insert(0, stuff)>>> pprint.saferepr(stuff)"[<Recursion on list with id=4370731904>, 'spam', 'eggs', 'lumberjack', 'knights', 'ni']"
But actually repr() handles this specific case just fine:
Pretty minimal difference there. Is there another reason we might care about saferepr()?
Dictionary string comparisons!
saferepr() first sets up the pprint pretty-printing machinery, meaning it takes care of things like sorting keys in dictionaries.
This is great! This is really handy when writing unit tests that need to compare, say, logging of data.
See, modern versions of CPython 3 will preserve insertion order of keys into dictionaries, which can be nice but aren’t always great for comparison purposes. If you’re writing a unit test, you probably want to feel confident about the string you’re comparing against.
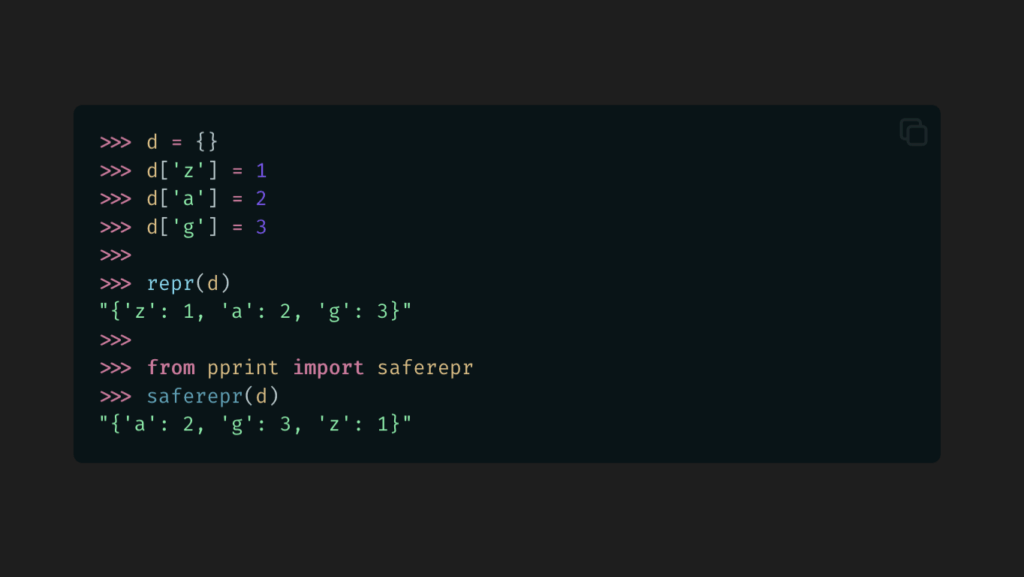
Let’s take a look at repr() vs. saferepr() with a basic dictionary.
A nice, stable order. Now we don’t have to worry about a unit test breaking on different versions or implementations or with different logic.
saferepr() will disable some of pprint()`’s typical output limitations. There’s no max dictionary depth. There’s no max line width. You just get a nice, normalized string of data for comparison purposes.
But not for sets…
Okay, it’s not perfect. Sets will still use their standard representation (which seems to be iteration order), and this might be surprising given how dictionaries are handled.
Interestingly, pprint() and pformat()will sort keys if it needs to break them across multiple lines, but otherwise, nope.
With this, you can set a style or a CSS variable based on some condition, like whether the device is on a touchscreen, or whether some CSS property is supported, or even based on an attribute on an element.
It’s really cool, and sooner or later we’ll all be (ab)using it.
Actually, you can pretty much do this today using CSS Variables, with a little understanding of how variable fallbacks work and how you can use this to make your own conditionals.
What are CSS Variables?
CSS Variables make it easy to use reuse colors and styles across a CSS codebase. At their most basic, they look like this:
CSS Variables can have fallbacks, which falls back to some other value if the variable isn’t defined. Here, the color will be black if --my-custom-fg-color wasn’t defined in the scope.
body {color:var(--my-custom-fg-color,black);}
This can be nested with other CSS variables:
body {color:var(--my-custom-fg-color,var(--my-fg-color,black));}
Fallbacks depend on whether the variable is truthy or falsy.
Truthy and Falsy Variables
When a variable is falsy, var() will use the fallback value.
When it is truthy, the fallback value won’t be used.
Normally, it’s falsy if the variable isn’t defined, and truthy if it is. But there are a couple tricks to know about:
You can make a variable falsy by setting it to the special keyword initial.
You can make a variable truthy (without expanding to a value) by making the value empty.
Let me show you what I mean:
:root {/* Empty -- Truthy and a no-op */ --no-fallback:;/* 'initial' -- Falsy, use fallback */ --use-fallback:initial;}body {background:var(--no-fallback,grey);color:var(--use-fallback,blue);}
This will result in the following CSS:
body {background:;/* No value -- ignored. */color:blue;}
Our new --use-fallback will ensure the fallback value will be used, and --no-fallback will ensure it’s never used (but won’t leave behind a value).
These are our core building blocks for conditional CSS Variables.
We can then combine these rules.
body {background:var(--no-fallback,red)var(--use-fallback,pink);color:var(--no-fallback,pink)var(--use-fallback,red);}
This will give us:
body {background:pink;color:red;}
Behold:
You can play around with it here:
Armed with this knowledge, we can now start setting CSS Variables based on other state, and trigger the conditions.
Setting Conditional Variables
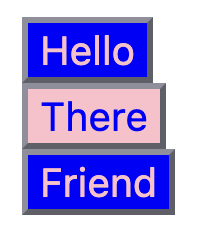
Let’s set up another contrived example. We’re going to put together some HTML with a button that styles differently based on where it’s placed. In this case, when in <main>, it will appear blue-on-pink and elsewhere it’ll appear pink-on-blue.
It’s my post and I will use hideous color palettes if I want to.
We’re going to set up some conditional state variables based on the main placement. (Yep, contrived example, but this is just for demonstration purposes.)
But now we can’t give users a nice toggle on the page to control their light/dark modes, so we’ll want to bring the CSS classes back with the media selectors:
Now let’s use all that to style <body> and <button>:
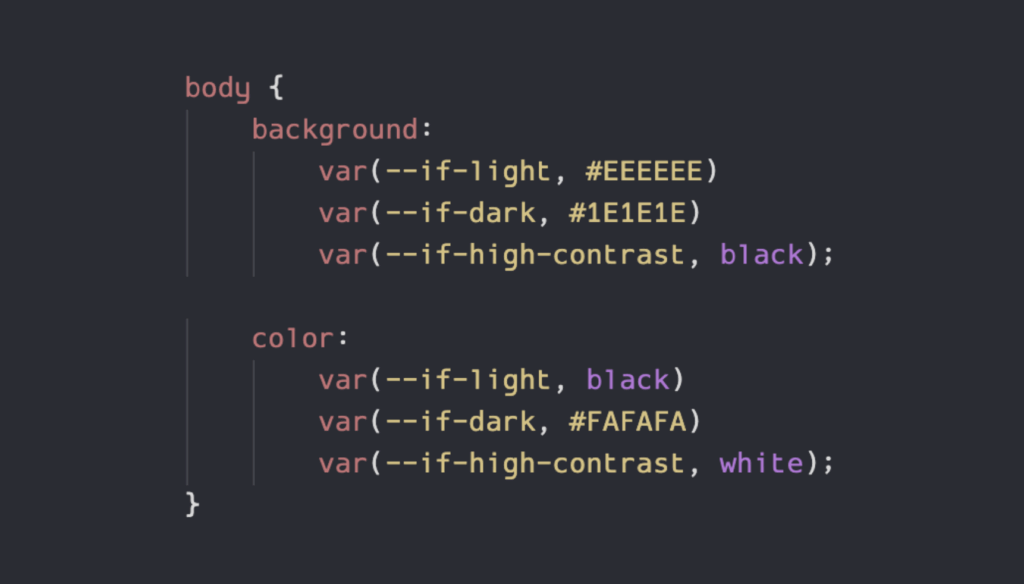
body {background:var(--if-light,orange)var(--if-dark,darkorange);color:var(--if-light,darkgreen)var(--if-dark,blue);}button {background:var(--if-light,pink)var(--if-dark,blue);color:var(--if-light,blue)var(--if-dark,pink);}
Look at that. So much simpler to maintain. And we can extend that too, if we want to add high-constrast mode or something.
Let’s test it.
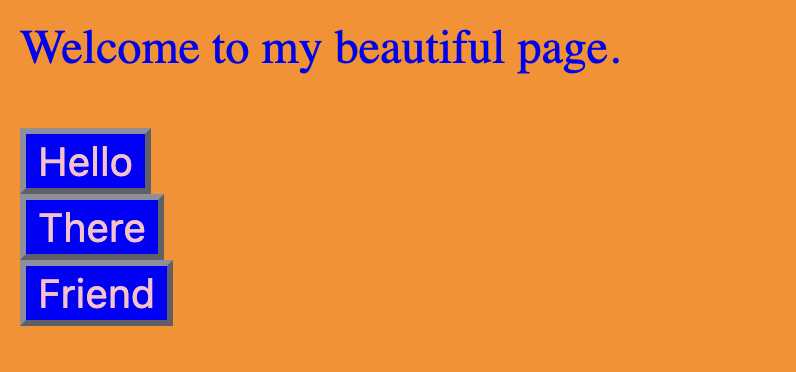
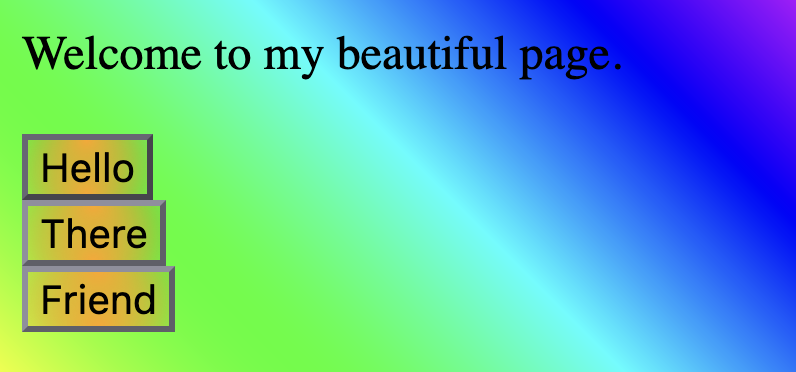
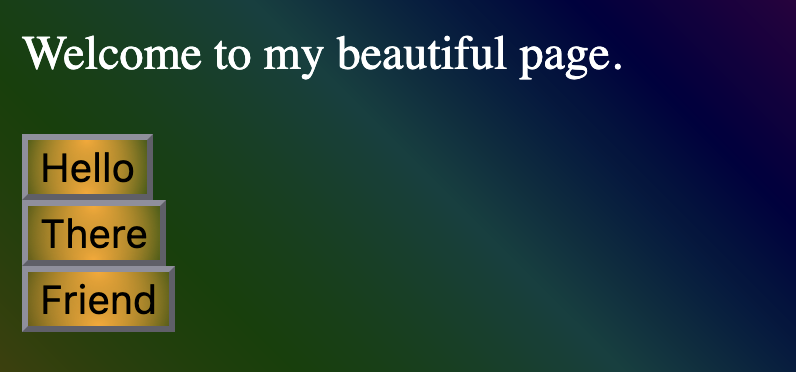
Here it is when we switch our system to dark mode:
Far less eye strain than light. I’m sold.
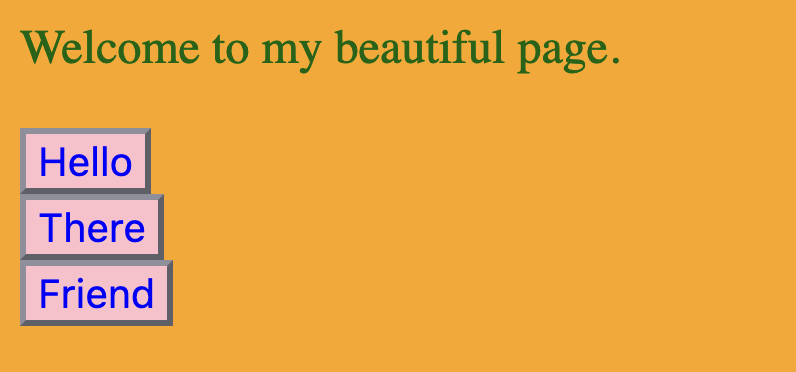
Now light mode:
And system dark mode with <html class="is-light"> overriding to light mode.
And system light mode with <html class="is-dark"> overriding to dark mode.
Perfection.
You can play with that one here:
Nesting Conditionals!
That’s right, you can nest them! Let’s update our Light/Dark Mode example to make a prettier color scheme, because I’m starting to realize what we had was kind of ugly.
We’ll define new --if-pretty and --if-ugly states to go along with --if-dark and --if-light:
And now we can build some truly beautiful styling, using nested conditionals:
body {background:var(--if-pretty,var(--if-light,linear-gradient( in hsl longer hue45deg,red0100%) ) )var(--if-dark,blacklinear-gradient( in hsl longer hue45deg,rgba(255,0,0,20%) 0100%) ) ) ) var(--if-ugly, var(--if-light, orange) var(--if-dark, darkorange) );color:var(--if-pretty,var(--if-light,black)var(--if-dark,white) )var(--if-ugly,var(--if-light,darkgreen)var(--if-dark,blue) );font-size:100%;}button {background:var(--if-pretty,radial-gradient(ellipseattop,orange,transparent ),radial-gradient(ellipseatbottom,orange,transparent ) )var(--if-ugly,var(--if-light,pink)var(--if-dark,blue) );color:var(--if-pretty,black)var(--if-ugly,var(--if-light,blue)var(--if-dark,pink) );}
In standard Ugly Mode, this looks the same as before, but when we apply Pretty Mode with Light Mode, we get:
And then with Dark Mode:
I am available for design consulting work on a first-come, first-serve basis only.
Here it is so you can enjoy it yourself:
A Backport from If()
Google’s article on if() has a neat demo showing how you can style some cards based on the value of a data-status= attribute. Based on whether the value is pending, complete, or anything else, the cards will be placed in different columns and have different background and border colors.
Here’s the card:
<divclass="card"data-status="complete"> ...</div>
Here’s how you’d do that with if() (from their demo):
You can use this today in all browsers that support CSS Variables. That’s.. counts.. years worth of browsers.
It requires a bit more work to set up the variables, but the nice thing is, once you’ve done that, the rest is highly maintainable. And usage is close enough to that of if() that you can more easily transition once support is widespread.
We’ve based Ink, our (still very young) CSS component library we use for Review Board, around this conditionals pattern. It’s helped us to support light and dark modes along with the beginnings of low- and high-contrast modes and state for some components without tearing our hair out.
Give it a try, play with the demos, and see if it’s a good fit for your codebase. Begin taking advantage of what if() has to offer today, so you can more easily port tomorrow.